Tuesday 19 August 2014

My Favourite Things

hand made beads


A few weeks ago Jewellery Maker TV asked me to write a blog post about some of my favourite things in jewellery making so here goes!

I LOVE making charm bracelets!
There is just something about wearing a bracelet that jingles and moves on your wrist with a satisfying weight. I have been making jewellery for over three years now and I think I have made more charm bracelets than anything else.

amethyst drops


I really enjoy choosing the gems, the colours and sizes that will go together and I usually try to find a range of different metal charms to add or even make my own with either jewel enamel or polymer clay.

Choosing the right chain is important  because you need a good sized link to enable you to put add the charms and to help you space them out to give a balanced look.
faceted shell pearls, shell discs and hand made jewel enamel beads


I have tried a variety of techniques but I think the one I use most often is to use a head pin and then roll it down  and either attach it straight onto the chain or use a jump ring to give a little extra movement. You do need quite a few headpins and I think these with the heart end from Jewellery Maker TV would really add that special touch


I love this little kit which gives you all you need to get going with a chain, S clasp and some little charms and if you add a few of your favourite gems you'll have a great result.


For those who like to embellish their charms I like these silver flash brushed flat charms because you can leave some as they are, stamp some and add detail embossing powder or use alcohol inks in a random pattern to add a bit of colour. That way you would get a range of colour and texture but using all the same charms

There is a bit of a craze for having charms that the wearer can re-arrange themselves. I have a pretty summertime one with enamelled beach themed charms and they are all on little lobster clasps. You could easily do this yourself or if you prefer you can add real gemstone ready made charms like this faceted amethyst 


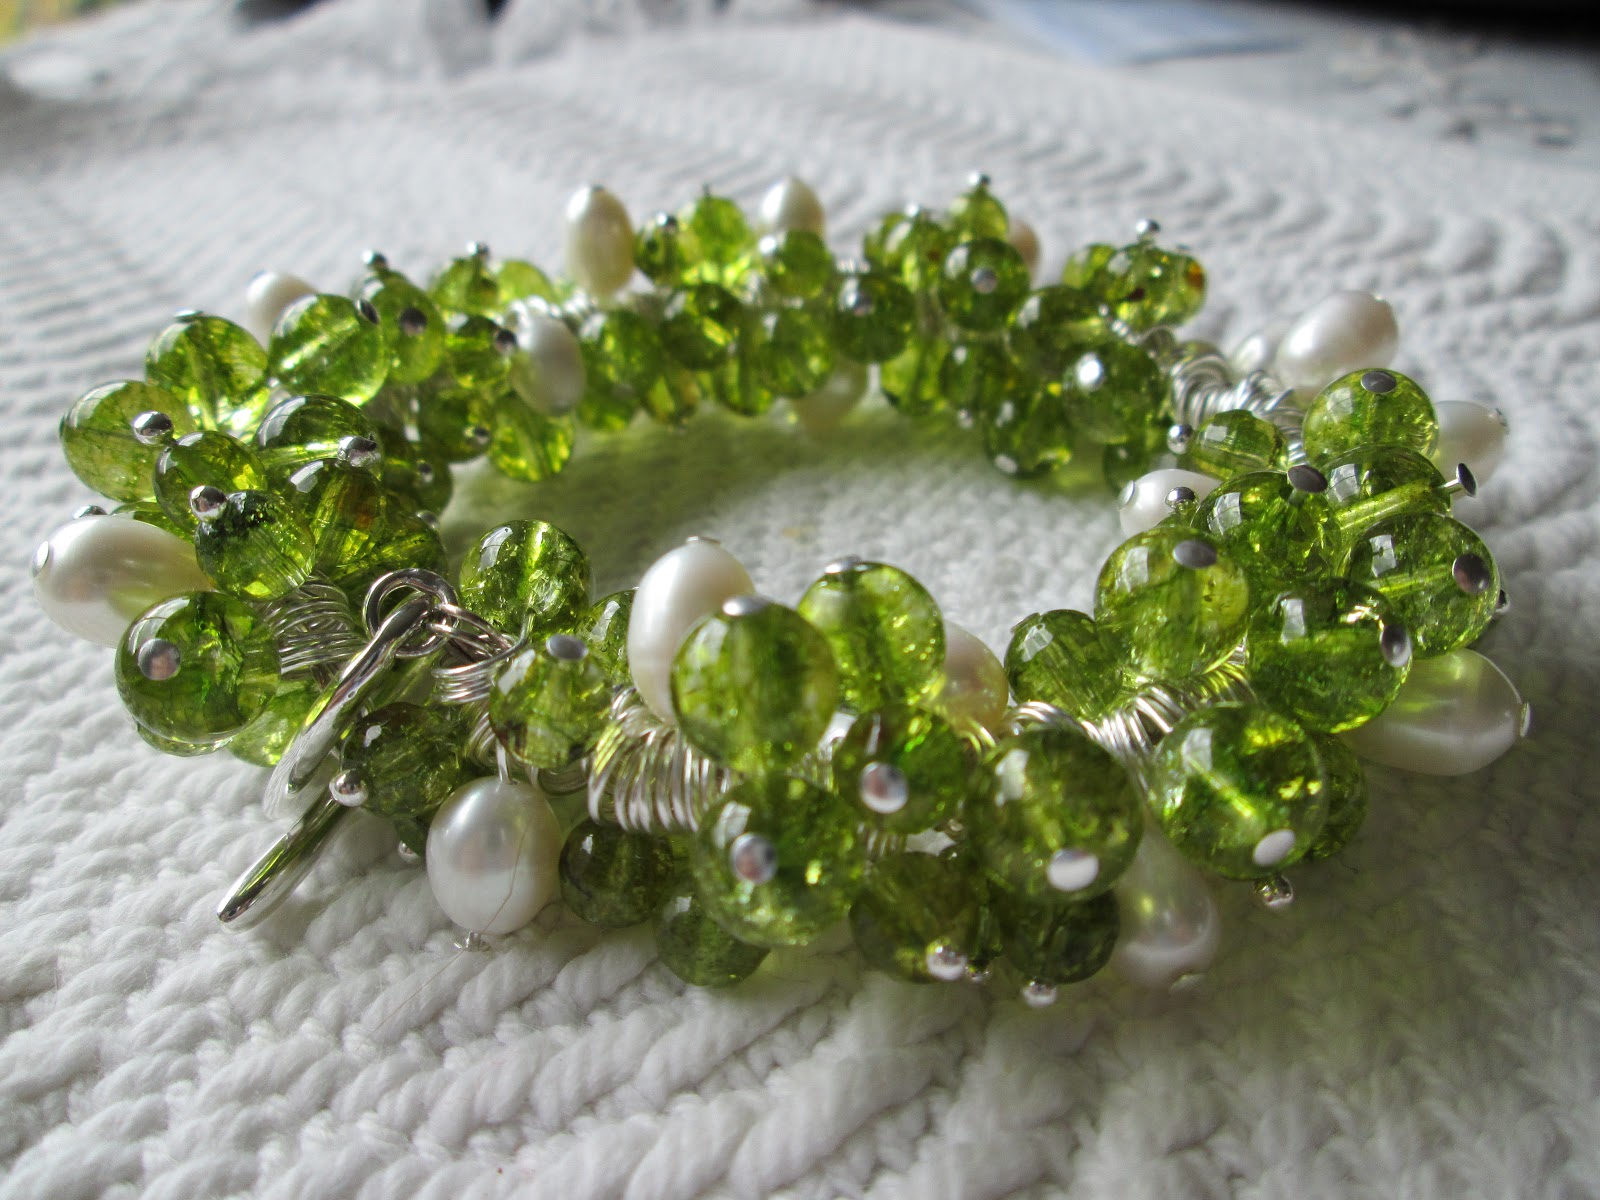
Here is one of my favourite charm bracelets made using some beautiful peridot rounds with little freshwater pearls. This little beauty went to a good home for someone with an August birthday!


I like to add one finishing touch by popping a "made with love"  or "handmade for you" charm usually on the extender chain or near the clasp

Every charm bracelet is different - they can be very personal like this cherry lips made for someone who loves "vamping it up"
                                          OR  a bit of fun like this bumble bee bracelet


OR to match an outfit like this shell pearl coffee and cream

BUT the wholepoint of a charm bracelet is that they feel great to wear!


New Venture

Well this is a bit of a momentous day........


Last week Jewellery Maker TV aired the last of their shows to feature jewel enamel which as my readers will know is my favourite medium to create with. It isn't their fault....Ranger, who make the melt pot,  have had to cease selling it because of an issue with the manufacturer and as the melt pot is really the essential tool for using jewel enamel this makes it hard to feature on a show because new viewers would be wanting to buy the pot.

Making jewellery this way is a slightly niche craft with many of us feeling our way in our designs and learning new techniques often by accident. So we need to gather together in some way which is why a few months ago I created a Facebook group for fellow crafters to share ideas, tips and inspiration and last week I realised  that we should make sure all our collective knowledge isn't lost.

I started gathering images into subject albums on our Facebook pages and that's when I saw that we needed more than just a few pictures with a brief description we needed proper tutorials with creative diary images.


In this modern age I think the best way to do that is to use a blog - so I have launched a team blog with a small group of admins and we will invite guest authors to share.
I love the fact that the blogging world is mostly public because this means anyone with a passing interest can drop in a have a browse.
There are some extremely talented people on the site so it is very exciting wondering what they will come up with.


I have quickly earned that I need to make sure I photograph everything during the making stage as well as the finished product because that is what people need to see....photo tutorials and diaries.


So for any of  my readers who would like to pop over, here is the link
www.jewelenamelgems.blogspot.co.uk

I will still be writing this blog and postimg more of my adventures in creativity and hopefully there will be more advances in skills as I learn from my fellow bloggers


Friday 1 August 2014

Strawberries and Cream - a Summer Project

Strawberries and Cream - a summer project


As part of a summer challenge for a Facebook jewellery making group I decided to create a fully loaded bracelet and charm pendant representing summer strawberries.
I have two lovely strawberry moulds and numerous leaf moulds which work well and I wanted to create hand made dipped beads in a clotted cream colour.
a home made mould

this is a Martha Stewart mould


To create the berry colour I used  Diamond Clear with two reds - Cosmic Shimmer's Berry Red and Crafty Notions Ruby Red


because it was quite time consuming to create a batch of charms I needed to keep turning down the heat to stop the mix going too orange
the small mould poured 

finished small berries
    I also poured the large strawberry


the finished strawberries
Next I created the leaves using Crafty Notions Peridot and Diamond Clear
Martha Stewart moulds
completed leaves


To make the beads I colour mixed a clotted cream colour using Diamond Clear with a small amount of Ranger's UTEE white and a sprinkle of Cosmic Shimmer's Light Gold


colour mix for beads

I played around with this until I got a slightly lighter colour than I needed - knowing it would darken with the heat


To make hand dipped beads you need a head or eye pin and then dip the finding in repeatedly, building up layers. You need to gently rotate the pin to make a round shape although the slightly imperfect ones have an organic feel. To make sure the colour is consistent I dipped each pin in turn with each layer building rather than making  a complete bead each time. 


just dipping the end of the eye pin into the mix


swirling gently to get a good shape


third dip


all lined up ready for the final dip

completed beads


the completed bracelet elements
the finished pendant elements

Finally I assembled the charm bracelet and created the charm pendant 

a close up of the bracelet


I think this has a real feel of those long summer days!