Showing posts with label tutorial. Show all posts

Saturday, 27 September 2014

Definately Different Donuts!

A while ago I watched Debbie Bulford, guest designer for Jewellery Maker TV, use jewel enamel to add subtle colour to polymer clay.
I am not a user of polymer clay but I thought the technique definitely deserved trying out so I bought some translucent clay to have a go.

The clay has to be conditioned which means working it until it become really pliable and smooth. This took quite a bit longer than I was expecting but after a  little bit of work I had a thin smooth piece.
Then I sprinkled some jewel enamel onto the surface and worked it in adding extra in small amounts until I had a pale even colour. It was a bit like trying to work sugar into dense pastry, bits kept falling out but I presevered and eventually had an even coloured piece.
I started with a turquoise mix using aquamarine and apatite jewel enamel

once the jewel enamel granules were worked right through the polymer clay I divided it up and made small balls which I flattened and then using a straw cut a hole in the middle to create a donut

I then made some deep blue using Lapis Blue jewel enamel


and finally I made a subtle green using Apatite


I put all the donuts on a piece of baking paper and popped them into the oven at 120C for 15 minutes
At the end of this time I saw that the jewel enamel had not actually melted so I turned the oven up to 140C and returned the clay for another 5 minutes but watched carefully - I didn't want to burn the clay.
This time the jewel enamel had melted and the colour of the clay had darkened considerably.

The clay had a matte finish and looked a little like sea glass. However I decided to let it cool and apply a glaze which really brought out the colours


I have some suede cord and silver tribal spacer beads so I think I will make a necklace. Watch this space for the finished piece!!


Tuesday, 15 July 2014

Using Texture Sheets, Treads and Mats

UTEE jewel enamel is beautiful with a glossy well polished surface on a cabochon especially if you have added a little clear to your mix to give that added depth - it is almost as if you can see into the heart of the cabochon.


But sometimes you want to add texture - perhaps you are struggling with heat polishing or you have used alcohol inks and ended up with lots of bubbles or you just want to include a lovely pattern.


This is where texture mats and sheets come into their own.
There are so many textures on the market but for jewel enamel you need to make sure that the sheet can take the heat and that there is a decent depth to the texture. You rarely get fine detail with a pour although it is always worth trying with a little scrap because you never know what surprising results you can get from the most unlikely looking texture.
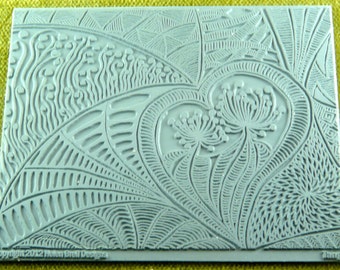
Helen Breil who works with polymer clay produces some wonderfully detailed sheets - some are too fine for UTEE but others have deep swirls that will give a great effect
a beautiful Helen Breil texture mat

Karantha who produce brilliant moulds also do a stunning range of texture mats made of very durable red rubber. Again choose carefully to maximise the effect
a Karantha texture sheet

Lisa Pavelka is well known for her textures which look stunning in jewel enamel

      these super textures are from Lisa Pavelka

Have you discovered Ranger's Texture Treads? They are thick black rubber sheets that have a look of being made from car tyres! They are designed especially for UTEE jewel enamel and have very deep texture. Each sheet is split into two - there will be an embossing side and a debossing side - one pattern going in and one going out. So use scrap to try which suits your project best.
you can see quite clearly the two sides of the sheet

Often when you use a texture sheet you will get a matte finish on the raised texture which you can heat polish. If you do decide to polish be very carful - too much heat or too long in one place with the gun and you will lose that lovely surface. Why not highlight the texture with mica powder gently rubbed over the surface with your finger or use gliding wax/gleams rubbed in. Once set you can buff these up to give a great shine.


I really like the way Leonie Pujol uses a texture sheet to pour onto - have a look at this youtube clip

I have written a blog post about pouring onto a texture sheet to create a suncatcher and you will see in detail how to use a cutter to pour into. The choice is yours - pour out and press the cutter into the UTEE or pour directly into the cutter.


A search on Google will get you plenty of images and tutorials plus super blogs about creative people experimenting with UTEE and texture sheets. However not many people will be using this for jewellery which is what I do.

If you are careful you can use rubber stamps ( remember the UTEE is very hot  so perhaps don't use your favourite stamp). I have also successfully used clear stamps to gently impress the surface of a poured bezel.


I think perhaps the simplest but most effective way I have used texture sheets it to create simple pendants which I strung onto seed beads or cord with either a stick on bail or with a large hole.
I use a multi temp soldering iron to melt my holes.


Tuesday, 4 February 2014

Suncatcher UTEE jewel enamel tutorial

Translucent UTEE jewel enamel is wonderful when the sun shines through it so I decided to create a suncatcher for my bedroom. The colour scheme is Santorini..so rich blues, sea greens and turquoise.
I wanted to create lots of discs with texture but thin enough to gently turn in the air.

I had heard that pouring UTEE straight into a cutter could be done as long as you use some sort of release  agent so I decided to try Versamark and pushed the cutters into the pad to coat the metal.


This method is easier than pouring onto a texture tread and then cutting out as it gives a sharper, cleaner edge and means you pour the mix less often so you can keep random swirl effects and of course you don't have to keep re-melting. I wanted three different sizes and was able to pour all three each time plus they cooled very quickly enough to carefully remove the cutter and do another pour before totally set. Very efficient!
choosing a part of the pattern

pour into the cutters

the cutter removes very easily

ready to take of the mat

I had some deep blue transparent left over from a previous project and a couple of pieces of a turquoise so I broke pieces off and added to clear then using a cocktail stick dabbed small spots of melt ink into the mix trying not to mix too much. It was a bit of a compromise because I didn't want too solid a colour and I also wanted good swirls.


I used blue, chartreuse and Paris green melt inks


Sometimes it worked others not so much!


this one is lovely

I poured the lovely deep blue separately as that is pure Santorini.
Finally I used a large bezel to create the  heavier central disc and used a texture tread to "stamp" onto the UTEE when still soft. Once cold I removed the disc from the bezel.


I love the way that the texture tread creates some parts matte and others shiny. I used the heat gun to enhance the gloss.


now all I have to do is create the actual mobile